Greyhound Collar and Harness Safety: Preventing Escapes
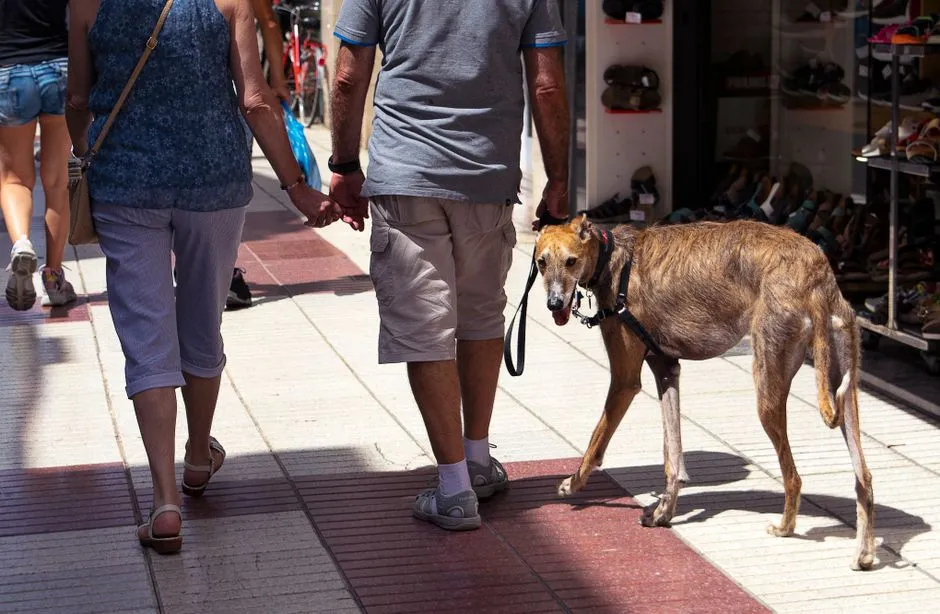
- Build an escape-prevention system, not a shopping list
- Know why a loose ordinary collar can fail
- Fit a martingale by testing its closed limit
- Choose a harness that resists backing out
- Is a head collar safe for a greyhound?
- Use two attachment points without creating a tangle
- Choose a fixed lead and manage the environment
- Give muzzles, trackers, and recall the right jobs
- Audit the dog and equipment every week
- Sources
Build an escape-prevention system, not a shopping list
A greyhound’s narrow head, long neck, deep chest, and sudden acceleration make walking equipment unusually dependent on fit. A wide sighthound collar or correctly adjusted martingale is common. An escape-resistant harness can add security and reduce neck loading. During the first weeks after adoption, a backup connection between collar and harness may be sensible.
No single product is escape-proof. Doors, gates, grip, lead choice, identification, training, and the individual dog all belong to the system. A premium harness still cannot latch the front door, however impressive its brochure may be.
Follow the adoption organisation’s equipment rules. Have an experienced adoption worker or qualified reward-based trainer fit the actual dog, then practise indoors. Recheck after weight, coat, health, or equipment changes. The fit test matters more than a label saying “greyhound.”
Know why a loose ordinary collar can fail
Many greyhounds have heads that are not dramatically wider than their necks. If a dog plants the front feet and backs away, a loose flat collar can travel over the skull. Greyhound Racing Victoria’s handling booklet identifies backing up as the highest-risk direction for slipping a collar and describes its buckle collar sitting directly below the head, high on the neck, with room for one or two fingers.
That measurement belongs to the buckle-collar design in that booklet. It is not a universal martingale formula. Products differ, and a broad fishtail collar, flat buckle collar, and limited-slip collar close differently.
A martingale has a control loop that shortens the main loop only to an adjusted limit. It should become too small to pass over the widest part of the head without closing endlessly like a choke chain. At rest, it should release pressure.
Fit a martingale by testing its closed limit
Start indoors with the dog calm. Open the collar wide enough to clear the ears, settle it high on the neck, and adjust the main loop. Gently engage the control loop while keeping fingers away from pinch points.
At the tightest intended position, the hardware or fabric stops should preserve the design’s limit. The collar must remain too small to pass over the head, yet must not create continuous throat pressure. Follow the maker’s instructions because connection points and control-loop lengths vary.
Test controlled backward movement without yanking or frightening the dog. One person can hold the lead while another rewards a single backward step. Watch whether the collar rides toward or over the ears. If confirming the fit requires force, stop and get hands-on help.
After short walks, inspect for redness, hair loss, rubbing, coughing, gagging, reluctance to move, or sensitivity. Stop using equipment that causes pain, breathing difficulty, wounds, or restricted movement. Breathing difficulty, collapse, uncontrolled bleeding, or severe trauma requires emergency veterinary care. Persistent, recurring, or concerning coughing, gagging, pain, limping, or skin injury requires assessment by a veterinarian; a qualified reward-based trainer can review handling only after the immediate health issue is addressed.
Never leave a martingale or dangling tags on an unattended dog where a loop could snag furniture, fencing, a crate, another dog, or play equipment. Follow the adoption organisation’s home-wear and identification plan.
Choose a harness that resists backing out
A harness can distribute force away from the neck, but an ordinary Y-front or step-in design may still be reversed out of. As the shoulders travel backward and the forelegs fold, loose straps can migrate over the chest.
Escape-resistant designs often add a third strap behind the deepest part of the ribcage. That section is narrower than the chest, making the harness harder to pull forward over the body. “Harder” is the useful promise; fit, anatomy, flexibility, wear, and handling still decide the result.
Check the harness indoors:
- The neck opening cannot pull over the head.
- The front leaves the windpipe free and does not cross the shoulder joints.
- The chest strap stays clear of the soft armpit area.
- The rear strap sits behind the ribcage without sliding onto the waist or abdomen.
- Straps lie close without obvious gaping, twisting, or pinching.
- The dog can walk, turn, lie down, pant, and breathe normally.
- Buckles do not hit the elbow or rub thin skin.
Watch the harness through turns and several rewarded backward steps. Recheck after each early walk because webbing settles and a newly adopted dog’s weight may change. Dogs Trust also advises choosing a harness that does not restrict shoulder movement and checking collar, harness, and lead for wear.
Is a head collar safe for a greyhound?
A head collar, also called a headcollar or head halter, loops around the muzzle and behind the head. It can help a handler redirect a strong puller, but it is neither an escape-proof collar nor a muzzle. It does not prevent biting, and a greyhound can paw or rub it off.
Use one only after an adoption professional, veterinarian, or qualified reward-based behaviour professional has confirmed that it suits this dog and has demonstrated the fit. The RSPCA’s kennel-welfare criteria say a head collar must be fitted so it does not irritate the eyes or lips, introduced gradually and positively, and used with a flat-collar backup. Repeated face rubbing, freezing, cowering, restricted breathing, or distress means stop and reassess with that professional.
Never jerk a lead attached to a head collar. Do not attach a retractable lead or long line to it. Dogs Trust warns that a dog hitting the end of a long line attached to a neck collar or head collar can be injured; a long line belongs on a well-fitted body harness. If a head collar is used for an ordinary walk, maintain a separately fitted body-harness or flat-collar backup as the professional directs.
Use two attachment points without creating a tangle
During the early greyhound adoption period, collar-and-harness redundancy can protect against one clip or fit problem. Options include a double-ended lead, two leads held together, or a short safety connector. Dogs Trust describes a double-ended lead attached to collar and harness as a way to guide a dog away from chase triggers.
Use hardware rated for the dog and arrange it so neither point tightens dangerously. Lines should permit a natural gait without wrapping legs. Practise clipping, turning, and crossing a doorway indoors. Hold the main lead securely rather than asking a short backup connector to carry routine tension.
More straps are not automatically safer. A system the handler cannot manage at a gate adds risk. Ask the adoption organisation to demonstrate its preferred setup, then perform the demonstration yourself before leaving.
Choose a fixed lead and manage the environment
A sturdy fixed-length lead gives predictable reach and direct feedback. Retractable leads create a long acceleration lane, can cause line injuries, and may add frightening noise if the handle is dropped. They are a poor default for a newly adopted greyhound.
Put the loop fully over the hand and close the fingers around the strap. Gather excess without wrapping it tightly around the wrist. A waist attachment may help some handlers, but it needs an appropriate release and should not be the only plan for someone who could be pulled over. A qualified professional can adapt the setup for mobility or grip limitations.
Clip equipment behind a closed exterior door. Where possible, create an airlock with a closed room door or gate before opening outside. Train a rewarded pause, but keep using the barrier after the pause looks reliable. Before walking, check for loose dogs, construction noise, narrow pavements, and other predictable pressure. Choose enough distance that the dog can observe without lunging, freezing, or spinning.
Do not tether a greyhound outside a shop or to movable furniture. For vehicle exits, attach the lead before opening the door or hatch and check traffic first. Use a restraint or secured travel area appropriate to the dog and vehicle; a walking collar alone is not crash protection.
Give muzzles, trackers, and recall the right jobs
A correctly fitted basket-style greyhound muzzle can reduce bite risk while allowing a full pant and, depending on design, drinking and treats. Condition it with food and short voluntary sessions. It must not rub the nose or eyes, prevent panting, or be used to suppress barking. Never leave a muzzled dog unattended. A muzzle does not prevent chasing, collision, escape, or distress.
A GPS tracker can help locate a missing dog, but batteries, signals, and attachments fail. Keep microchip registration current and use readable identification where lawful and safe. Store a clear current photo, microchip number, adoption contact, local animal-service details, and emergency veterinary number where every handler can find them.
If the dog escapes, avoid direct pursuit or surrounding them. Report the loss promptly to the adoption organisation, microchip registry, nearby animal services, shelters, and veterinary clinics. Dogs Trust’s UK guidance specifically includes local and neighbouring council dog wardens, kennels, rehoming centres, and vets; use the equivalent official routes where the dog is lost.
For free running, follow local law, the adoption contract, and individual guidance. Inspect every gate, fence, gap, surface, and sharp object in the enclosed area. Stay inside. Practise recall first indoors, then on lead, then on a long line attached to a harness in suitable conditions. Dogs Trust recommends secure areas such as gardens or private fields for off-lead time. Affection is excellent; it is not a perimeter fence.
Audit the dog and equipment every week
Run fingers along webbing for cuts, thinning, dirt, pulled stitching, and chew marks. Operate every buckle and clip. Check metal for bending, corrosion, and gates that no longer close fully. Clean and dry equipment according to the maker’s instructions.
Examine the neck, chest, armpits, and belly. Stop using equipment over wounds and ask a veterinarian how to protect the area. Our greyhound veterinary guide covers skin and wound precautions.
Behaviour belongs in the audit. Sudden harness avoidance may reflect fear, pain, or poor fit. Do not force equipment over that signal. Sleep also has an equipment boundary: manage snag-prone gear under the adoption plan, provide an undisturbed bed, and follow the sleep-startle safety rules before reaching near a resting head.
Secure walking should look pleasantly uneventful: fit checked, doors closed, lead attached, route chosen, dog observed. Save the excitement for a magnificent sniff and the discovery that one particular lamppost apparently contains breaking news.
Sources
- Greyhound Racing Victoria: Greyhound Care and Standards attendant booklet
- Greyhound Trust: Training tips and long-line guidance
- Dogs Trust: How to stop chasing
- Dogs Trust: Harness training
- Dogs Trust: What to do if you have lost your dog
- RSPCA: PawPrints kennelling welfare criteria
- American Veterinary Society of Animal Behavior: Humane Dog Training position statement